Introduction
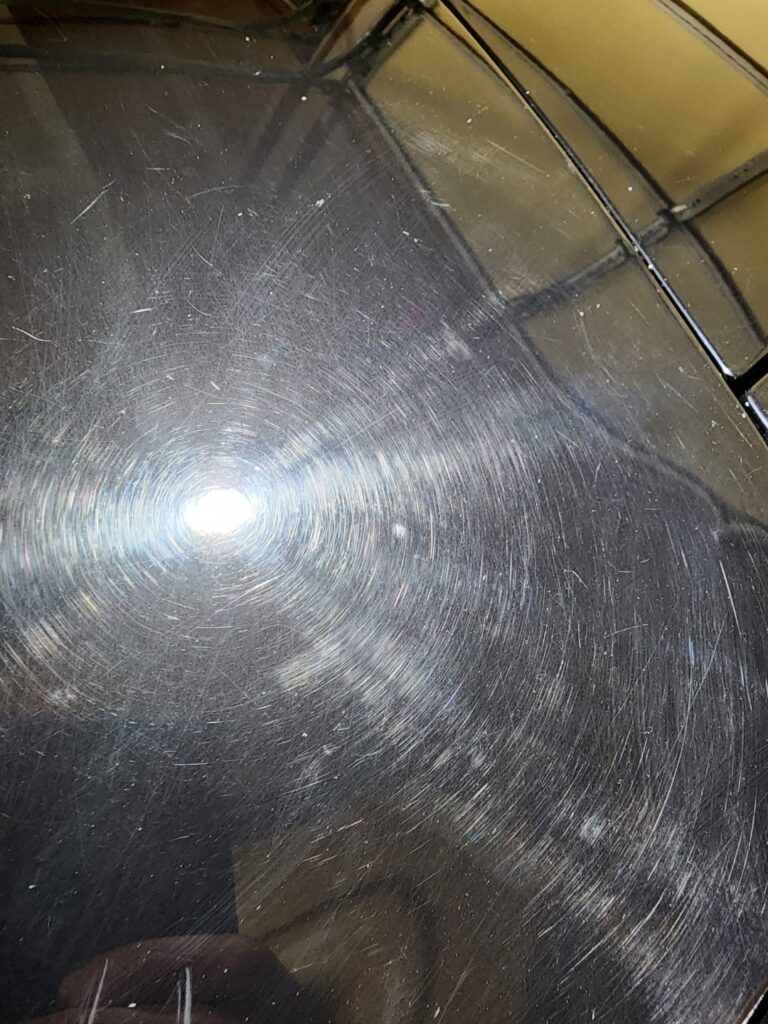
Swirl marks are the dreaded, spiderweb-like scratches that appear on a car’s clear coat. They’re especially frustrating when you notice them soon after a paint correction job—just when you thought your vehicle’s finish was protected. If you’ve invested time or money into a thorough paint correction, it’s only natural to want to prevent swirl marks after paint correction so your car stays looking brand new.
In this comprehensive guide, we’ll explore exactly why swirl marks reappear, how to stop them from sneaking back, and the 11 pro tips you can apply immediately to maintain a flawless finish. We’ll also review key tools, share step-by-step maintenance routines, and offer helpful FAQs before concluding with essential takeaways.
Maintaining a swirl-free surface might seem like a daunting task, but with the right techniques and consistent habits, you’ll preserve your fresh paint correction for longer. Let’s dive in and discover how a little know-how and attention to detail can keep your vehicle gleaming for months—or even years—after your initial paint correction.
Swirl Marks 101
Swirl marks are more than just superficial scratches. They represent a breakdown in your vehicle’s protective clear coat. Often formed by improper washing, drying, or use of low-quality detailing tools, swirl marks reflect light in a halo-like pattern that’s easy to spot under bright sunshine or garage lights. Understanding how these marks form will set the stage for preventing them in the future.
- Definition of Swirl Marks
Swirl marks are essentially micro-scratches in the clear coat—the topmost layer of your car’s paint system. While they might not compromise the structural integrity of the paint, they certainly impact the overall luster and depth of shine. - Common Causes
- Improper Washing: Using a single bucket of water, skipping a pre-rinse, or scrubbing the surface with a dirty mitt are prime culprits.
- Inferior Towels: Using old, rough towels or contaminated microfiber can introduce new scratches.
- Aggressive Polishing: Using the wrong pad or abrasive compound can create swirl-like patterns.
- Impact on Paint Appearance
Besides looking unkempt, swirl marks dull your paint’s finish and reduce reflectivity. They can age your car prematurely and reduce resale value if left unchecked.
Why They Form on Freshly Corrected Surfaces
It’s especially frustrating to see swirl marks after you’ve gone through the trouble of paint correction. One reason is that post-correction paint is more exposed because you’ve leveled or removed a portion of the clear coat. Another factor is how you handle the freshly corrected surface:
- Harsh Environmental Conditions: Pollen, dust, and industrial fallout can cling to the paint and cause scratches during washing or wiping.
- Contaminated Tools: Even a small piece of dirt trapped in a polishing pad or washing mitt can reintroduce swirl marks.
- Rushed Maintenance: Skipping recommended curing times for sealants or coatings can leave paint vulnerable.
Telltale Signs of Improper Correction
Not all swirl marks appear because of routine wear. Sometimes, they indicate that the paint correction wasn’t done properly:
- Halos vs. Swirl Patterns: If you see uniform swirl patterns, it often signifies a polishing error rather than random micro-marring from washing.
- Inspecting Under Direct Light: Swirl marks become obvious under strong LED lights, natural sunlight, or a specialized detailing inspection lamp. If you spot consistent patterns, it might be time for a revisit to your paint correction process.
Preparing for Success
Preventing swirl marks after paint correction starts with careful planning. The tools you use and the way you set up your workspace can make a remarkable difference in how well you preserve your vehicle’s finish. Taking a few preparatory steps before you even touch the car will help you avoid reintroducing flaws.
- Safe Washing Strategies
The single most common reason swirl marks reappear is improper washing. Adopting the right washing method drastically cuts down on the chances of scratching. - Gathering Essential Tools
- Quality Microfiber Mitts: Opt for plush, high-GSM microfiber designed for automotive paint.
- Multiple Buckets: The two-bucket method is a game-changer for swirl prevention.
- pH-Neutral Shampoos: Harsh detergents weaken protective layers, so use a specialized car shampoo.
- Setting Up a Proper Work Area
- Indoor vs. Outdoor: Ideally, wash your vehicle in a shaded or indoor space to avoid direct sunlight.
- Clean Surface: Sweep or rinse away loose dirt to prevent it from becoming airborne and settling on your car.
- Lighting: Good lighting helps you see contaminants and swirl formation as you work.
Shampoo & Grit Guard
One of the simplest yet most effective swirl-preventing measures is using a high-quality, pH-neutral car shampoo in combination with grit guards. Grit guards sit at the bottom of your bucket, trapping dirt and particles so they don’t float back up into your wash mitt.
- Importance of Quality Wash Products
Using a shampoo formulated for automotive finishes ensures the solution has the right lubricity to lift and encapsulate dirt. This prevents grime from dragging across your paint. - Using Grit Guards Effectively
After each pass with the mitt, swirl it around the bottom of the rinse bucket to dislodge dirt. The grit guard keeps that debris at the bottom, away from your mitt.
The Two-Bucket Method
A major step in learning how to prevent swirl marks after paint correction is mastering the two-bucket method. You’ll have one bucket for soapy water (wash bucket) and one for clean water (rinse bucket).
- Step-by-Step Guide
- Pre-rinse the car to remove loose dirt.
- Dip your wash mitt into the soapy bucket, gently wash a small section.
- Rinse the mitt in the clean water bucket, using the grit guard to dislodge particles.
- Repeat across the car, always working top to bottom.
- Minimizing Swirl Re-introduction
This process isolates dirt in the rinse bucket, instead of letting it mix back into your wash solution, drastically reducing the risk of micro-scratches.
Paint Correction Essentials
When swirl marks persist even after a detail, it often means there’s a gap in paint correction knowledge. Understanding the fundamentals of how paint correction works—and why certain products or techniques are used—will help you do it right the first time or evaluate the work of a professional.
- Understanding Paint Layers
Your car’s paint typically consists of a primer, color coat, and clear coat. During paint correction, you’re essentially leveling out or removing micro layers of the clear coat to eliminate flaws. Overdoing this can weaken your clear coat, so technique and caution are vital. - Polishing Pads and Compounds
- Polishing Pads: These come in various materials like foam, microfiber, and wool. Each has different cutting and finishing characteristics.
- Compounds: Heavy-cut compounds remove deeper scratches, while fine polishes smooth out the finish for clarity and shine.
- Work Speed and Technique
Slow and steady wins the race here. Moving the polisher too quickly can cause uneven results or, worse, introduce new swirl marks. Consistent arm speed, overlapping passes, and not lingering too long in one area will yield better results.
Compound vs. Polish
Though sometimes used interchangeably, compounds and polishes serve distinct roles in paint correction.
- Compounds: These have larger abrasive particles to tackle deeper scratches and oxidation. They remove defects but often leave a hazy finish.
- Polishes: Finer abrasives refine the paint surface to create that mirror-like shine, removing the haze left by compounds.
Using the wrong product at the wrong time can lead to swirls or an incomplete correction. Many detailers start with a test spot using milder polishes before moving up to heavier compounds if needed.
Pad Selection & Maintenance
Different pad materials yield different results:
- Foam Pads: Good for finishing or light polishing. Available in different “cut” levels, indicated by color coding from various manufacturers.
- Microfiber Pads: Offer more cutting power than foam while still providing a decent finish.
- Wool Pads: Typically reserved for heavy correction; can leave behind micro-marring if not followed by a finer polishing step.
Cleaning and Reusing Pads: Contamination is the enemy of swirl-free finishes. After each panel, use a pad brush or compressed air to remove residue. If the pad becomes saturated, switch to a fresh one.
Proven Strategies to Prevent Swirl Marks
Preventing swirl marks after paint correction isn’t about one magic trick; it’s about stacking multiple, careful practices. From how you wash and dry to the products you apply, every step either protects your finish or puts it at risk. Let’s look at some tried-and-true methods that detailers swear by.
- Gentle Washing Routines
Repetition is key, and adopting consistent, gentle washing habits will significantly reduce swirl formation over time. - Proper Drying Methods
Using the wrong drying technique can undo all your meticulous washing efforts. Even a perfect wash can lead to swirl marks if you drag dirt across the paint while drying. - Layering Protection
Whether you opt for a traditional wax, a synthetic sealant, or a cutting-edge ceramic coating, each layer adds a sacrificial barrier that takes the brunt of scratches before your clear coat does.
Using Microfiber Towels Correctly
A high-quality microfiber towel is your best friend when it comes to preventing swirl marks after paint correction. Cheaper towels, or those with worn fibers, can degrade your clear coat over time.
- Towel Quality: Look for tags like “edgeless,” “ultra-plush,” or “Korean microfiber.” These tend to have a soft pile that won’t mar the surface.
- Techniques for Scratch-Free Drying: Instead of dragging the towel, blot or pat dry. If you prefer a wipe motion, use very light pressure and move in straight lines rather than circles.
Sealants, Waxes, and Ceramic Coatings
Choosing the right protective product can make or break your swirl prevention strategy:
- Wax: Natural carnauba wax gives a warm shine but usually lasts only a few weeks.
- Sealant: Synthetic sealants can last several months and often provide better water beading.
- Ceramic Coatings: Advanced formula that bonds with the clear coat, offering robust, long-lasting protection—sometimes lasting years.
Each product type demands a specific application method. Improper application can cause streaking or even micro-scratches if you use contaminated applicators.
Smart Storage and Handling
Even a perfectly maintained vehicle can get swirl marks from incidental contact or environmental factors.
- Indoor vs. Outdoor: Storing your car in a garage or under a carport reduces exposure to dust, bird droppings, and direct sunlight.
- Cover Usage: If you must store outdoors, invest in a high-quality, breathable cover. Dirty covers can scratch the paint when they flap in the wind.
Keeping your environment as clean as possible extends the benefits of your paint correction.
FAQs
Before we close, here are six frequently asked questions with direct, concise answers. These address common points of confusion and will help clarify your approach to swirl prevention and paint maintenance.
- Q: How often should I wash my car to prevent swirl marks?
A: Aim for once every one to two weeks, depending on how much dirt accumulates. If the car isn’t visibly dirty, you can stretch it longer. Avoid unnecessary washes, as each wash cycle poses a small swirl risk. - Q: Are touchless car washes safe for fresh paint correction?
A: Touchless car washes reduce physical contact, but the high-pressure jets and strong chemicals can strip protective coatings and sometimes push grit across the paint. If you must use them, reapply your wax or sealant more often. - Q: What’s the best way to remove water spots without creating swirl marks?
A: Use a dedicated water-spot remover or a diluted vinegar solution sprayed onto a soft microfiber towel. Gently blot rather than scrub, and rinse with clean water afterward. - Q: Can I use a chamois instead of a microfiber towel for drying?
A: While natural chamois can work, they often lack the nap to trap dirt away from the paint surface. Microfiber towels are generally considered safer for swirl prevention. - Q: Do I need to polish my car every time I see minor swirl marks?
A: Not necessarily. Light swirl marks can often be masked or minimized with a good glaze or a filler-heavy wax. However, if the swirls are severe or widespread, a light polishing session might be warranted. - Q: Is machine drying with leaf blowers or dedicated car dryers safe?
A: Yes, using forced air is often one of the safest drying methods since it doesn’t physically touch the surface. Just ensure the blower intake is clean so it doesn’t shoot debris onto your paint.
Conclusion
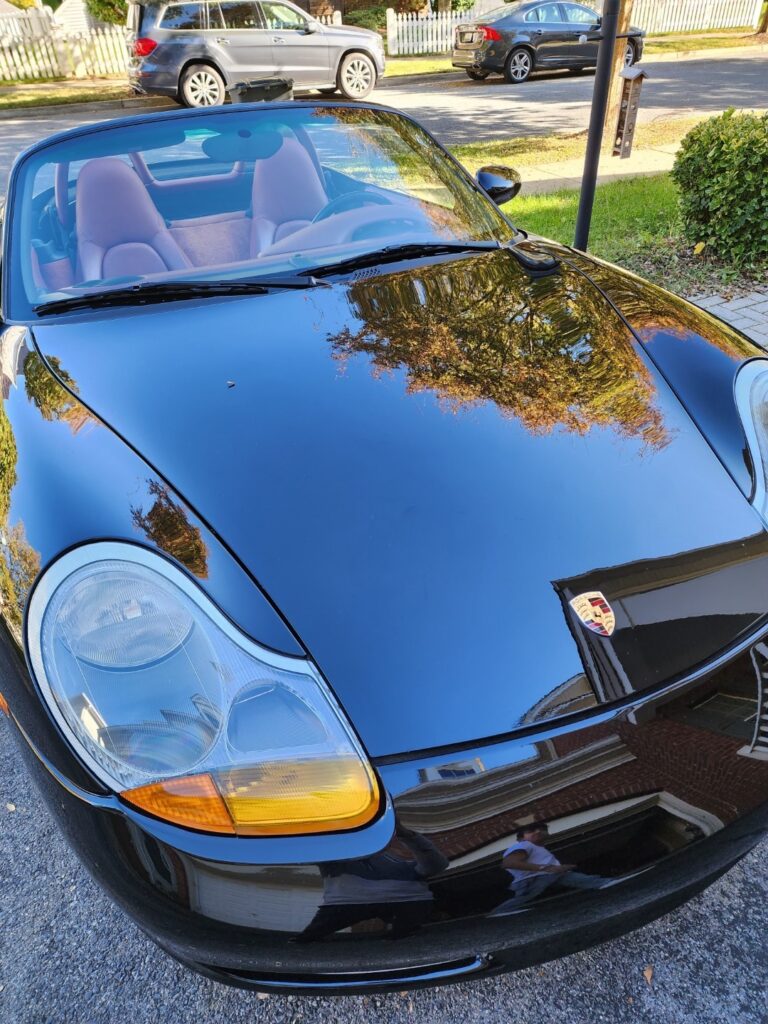
Preserving a swirl-free finish after a thorough paint correction requires consistent effort, but it’s by no means impossible. By learning how to prevent swirl marks after paint correction, you’ll maintain the gloss and depth that make your car look like it just rolled out of a showroom. When you combine proper washing methods—like the two-bucket system—with high-quality microfiber towels, you drastically cut down on swirl risk. Further protect your finish by using sealants, waxes, or ceramic coatings, and by storing your car indoors or under a proper cover whenever possible.
Remember, your car’s paint is only as good as your habits. Small details, such as choosing the right pad, letting products cure properly, and consistently using grit guards, collectively build a solid defense against swirl marks. Should you ever feel unsure about a particular technique or product, consult with a trusted detailing professional or seek additional resources. One excellent external reference is Autogeek’s Detailing Resource, which provides deep dives into various detailing topics for all skill levels.
With diligence and the right approach, you can enjoy the fruits of your paint correction efforts for months—if not years—to come. Embrace the mindset of prevention, stay organized with your detailing routine, and your vehicle will thank you with a radiant, swirl-free shine.